Beauty, DIY, Nail Art, Nail Art Tutorial, Nails, Nails How To, Uncategorized

NYFW Inspired Manicure Tutorial: Halo Nails

New York Fashion Week was nail art heaven!

From textured nails to sleek designed nail art and the occasional three-dimensional pieces on fingertips, manicures held their own on the runway.

A halo nail design showcased by Ruffian, particularly caught my interest and I recreated it.

Find out how to get the cat walk look.

halo-nails-tutorail

The platinum halo stands out behind a matte finish.

What you will need: Base coat, silver polish, top coat, black polish and matte top coat.

1. Prep the nail with a base coat. Apply two coats of silver polish on all the nails. Once dry, apply top coat.

2. Use black polish to paint an upside down U and fill it in to form the platinum halo on the top. Apply a matte coat on the black polish when it is dry.

Check out this six-second tutorial to see how this fabulous manicure went from runway to everyday.

What do you think of the halo manicure? If you try the design, let me know by tagging me on Instagram @nailartbysig! 

Standard
Beauty, Breaking Bad, DIY, Nail Art, Nails, Uncategorized

Breaking Bad Inspired Nails

Breaking Bad inspires me.

My obsession with the epic AMC series and commitment to express my love and appreciation for the cast and crew, has taken my nail art skills to another level.

Please enjoy my series of Breaking Bad inspired nail art:

-To my other favorite, W.W., It’s an honor watching you. Fondly, S.N.

Image

Instagram: @nailartbysig

-Goodbye Los Pollos Hermanos, hello Vamonos Pest!

vamonos-pest-breaking-bad-nails

Instagram: @nailartbysig

-Ain’t it beautiful crystal blue persuasion? 

breaking-bad-nails

Instagram: @nailartbysig

-From parking tickets to mass murder. Better call, Saul! Because he cares. 

better-caul-saul-nails

Instagram: @nailartbysig

-Remember his name. 

heisenberg-nail-art

Instagram: @nailartbysig

-The first lab, the Crystal Ship. 

breaking-bad-rv-nails

Instagram: @nailartbysig

-All hail the king.

breaking-bad-logo-nails

Instagram: @nailartbysig

-The end is here.

breaking-bad-finale-ozymandias-nails

Instagram: @nailartbysig

I also attempted to make some progression videos to show how I got to the final design. Take a look.

What do you think about my Breaking Bad inspired manicures?

Standard
Beauty, DIY, Nail Art, Nail Art Tutorial, Nails, Nails How To, Uncategorized

Nail Art How To: Glitter Manicure

If you’re in the mood to get crafty, I’ve got the perfect project for you.

gliter-nails-manicure-how-to

Sprinkle on the pixie dust to add some texture and glamour to your digits.

Textured manicures are trending this Fall season. But if you still haven’t been convinced of the look, try out this design to get a similar effect using typical arts and craft glitter.

What you will need: Loose glitter dust, red polish, clear polish, base and top coat, some q-tips and nail polish remover.

1. Prep the nail with the base coat. Apply two coats of red polish to the entire nail.

2. Once dry, dab on some clear polish to the top of the nail bed without getting too close to the nail matrix. Sprinkle on the glitter dust while the clear polish is still wet. Shake off any excess glitter and clean up around the nail using a q-tip dipped in polish remover.

3. Let the design completely dry and finish off with a top coat.

Check out this video and find out how glitter really does make everything better.

Let me know if you try this look by tagging #nailartbysig in your photo. Good luck! 

Standard
Beauty, DIY, Nail Art, Nail Art Tutorial, Nails, Nails How To, Uncategorized

Nail Art How To: Love Triangle

The chevron manicure isn’t going anywhere any time soon. But I figured, a new season calls for some change.

chevron-nail-how-to

A sleek spin on a classic chevron manicure. Get this look in three steps.

If you’re a fan of nail art, you probably saw this look in Nail It! Magazine’s September issue. The beauty publication called this design, “Love Triangle.”

Find out just how easy it is to move the chevron pattern tip-ward.

1. Prep the nail with a base coat. Apply two coats of red polish.

2. Once dry, apply purple polish from the nail matrix to the tip with a diagonal stoke leaving a small triangle on the tip of the nail bed.

3. Let the design completely dry and finish off with a top coat.

Check out this six-second tutorial to see the application process.

Let me know if you try this design. Good luck!

Standard
Beauty, DIY, Nail Art, Nail Art Tutorial, Nails, Nails How To, Uncategorized

Nail Art Hack: The Dotting Tool

No dotting tool? No problem!

Turns out you don’t really need a nail art pen to add contrast and designs to your manicure.

no-dotting-tool-how-to-nails

Easily add design to your manicure using items around the house.

Here’s a nail art hack: You can replace a dotting pen with toothpick or a bobby pin.

What you’ll need: Base coat, pink polish, green polish, light green polish, top coat, a piece of foil, a q-tip, a toothpick or bobby pin.

1. Prep the nail with a base coat. Apply two coats of pink polish on the entire nail.

2. Take a light green polish and put a blot of lacquer on a piece of foil. Dab some of the polish on the end of a q-tip and apply dots to the nails.

3. Put another blot of green polish to the foil and use the ball point end of a bobby pin, or a toothpick with the end broken off, to apply dots over the light green polish dots.

4. Let the design completely dry and finish off with a top coat.

Check out this six-second tutorial and find out for yourself how easy this manicure can be executed.

Let me know if you try this design! What colors did you go with?

Standard
Beauty, DIY, Nail Art, Nail Art Tutorial, Nails, Nails How To, Uncategorized, Vine

Nail Art How To: Dripping Paint

While out with a couple of girlfriends at a local wine bar on Thursday night, my inner artist met my inner wino during a Paint Nite event- a beautiful combination of art lessons and alcohol.

A blank canvas, some paint and two glasses of sangria later, I recreated a version of what the art teacher described as, “Colorful Birds on a Wire.”

dripping-paint-owls-on-a-wire

The masterpiece I created at a Paint Nite event inspired a manicure.

Naturally, I got inspired to recreate the painting on my nails.

nail-art-how-to-dripping-paint-tutorial

Recreate this dripping paint manicure in five easy steps.

While at the event, I learned a new technique called dripping paint. I put my new found knowledge to work.

Here’s how to execute a dripping paint manicure.

1. Prep the nails with a base coat. Apply two coats of white polish.

2. When the nails are dry, use a dotting tool to apply blots of blue polish around the nail bed. With a bit of polish on the dotting tool, drag some of the lacquer down to the nail tip for the dripping effect. Repeat this step with a color palette of your choice.

3. When the polishes are dry, use a thin brush to draw a black line across the tip of the nail to draw the wire.

4. To draw an owl, use a dotting tool with a small sphere and black polish to create an oval (the body) and a circle (the head) on top of on the black line. Draw an upside down arch line on the top of the circle to make the owl’s feathers.

5. Let the design completely dry and apply a top coat.

Take a look at this six-second tutorial to see how I layered the different colored polishes and got the dripping paint effect.

What do you think about the dripping paint effect? Let me know if you try this look!

Standard
Beauty, DIY, Nail Art, Nail Art Tutorial, Nails, Nails How To, Nintendo, Nintendo 2Ds, Princess Peach, Super Mario Bros., Uncategorized, Yoshi

Super Mario Bros. Nails Tutorial

On Wednesday, Nintendo announced a new gaming system, the Nintendo 2DS- that’s definitely not a typo.

The new “entry-level handheld” plays 3D games in 2D and will reportedly be available in October.

In honor of the news brought to us by the video games giant, I was inspired to create Super Mario Bros. manicure.

Super-Mario-Nails-Super-Mario-Bros-Nail-Art

Nintendo announces a new entry-level handheld and I create a manicure inspired by the news.

If you’ve ever delved into the world of Mario, then you’ve certainly come across many of his friends . . . and enemies.

Let’s go level by level in this Super Mario Bros nails tutorial. Here we go!

What you will need: Light blue polish, red polish, green polish, blue polish, purple polish, light pink polish, black polish, yellow polish, white polish and a thin brush.

1. Prep the nail with a base coat. Apply two coats of light blue polish on the thumb. Apply two coats of red polish on the index finger. Apply two coats of light pink polish on the middle finger. Apply two coats of green polish on the ring finger. Apply two coats of white polish on the pinky.

2. Once dry, use a thin brush and yellow polish to outline and paint the star on the thumb. Outline the star with black polish after the yellow polish completely dries.

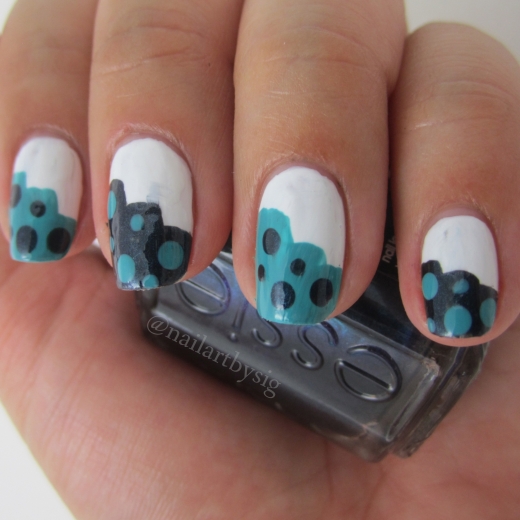
3. Using the thin side of the white polish brush, paint half a circle on the tip of the index finger nail to create a mushroom. Paint one medium-sized circle in the center top and two half circles on the each side. Use a thin brush and black polish to draw two lines for eyes on the bottom half-circle. Repeat this step on the ring finger.

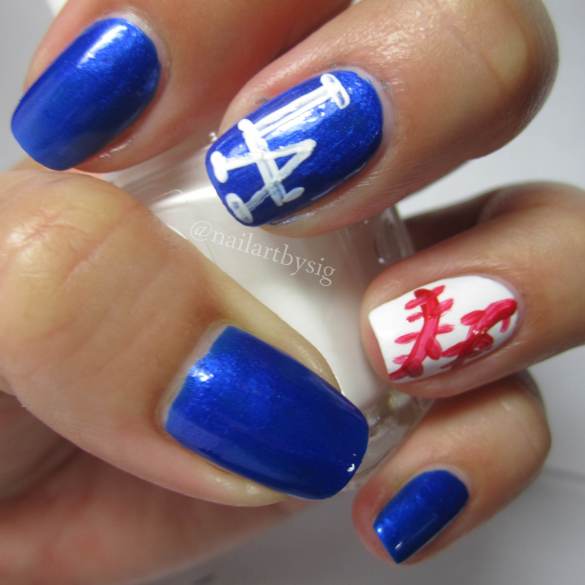
4. Paint the bottom half of the middle finger nail with a dark pink polish. Use the thin brush and white polish, paint a french-tip. Use the thin brush and blue paint to draw a blue oval for Princess Peach’s blue gem. Outline the gem with a thin brush and yellow polish once the blue polish is dry.

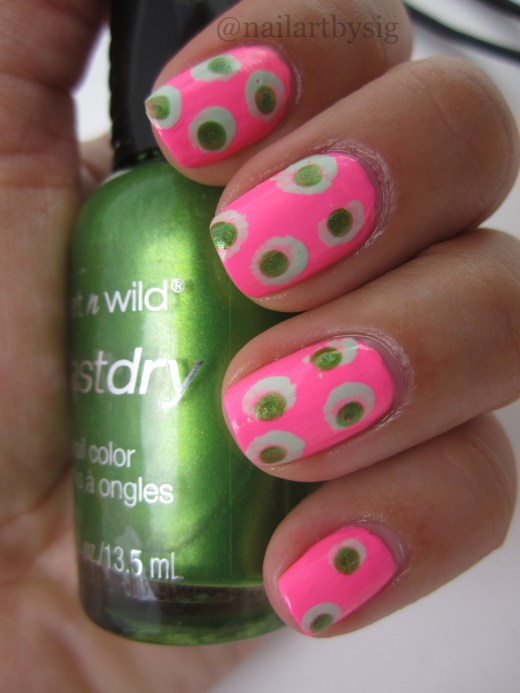
5. Use the thin side of the purple polish to paint colored spots found on Yoshi eggs.

6. Let the design completely dry and finish off with a top coat.

Press start to play this six-second tutorial and find out how this 2D design came to be.

Let me know if you try this look! 

Standard
Art Deco, Beauty, DIY, Minnie Mouse Nails, Nail Art, Nail Art Tutorial, Nails, Nails How To, Uncategorized

Art Deco Nails Tutorial

Be retro and bold in a manicure filled with geometric shapes and strong colors.

Polka-Dots-Nails-Stripes-Nails-Nail-Art

Be bold in an art deco manicure that’s easy to execute with two techniques.

To execute this art deco manicure, you’ll need to mix two techniques: brushing and dotting. You’ll also need three different colored polishes of your choice.

Let’s get to work.

1. Prep the nails with a base coast. Once dry, apply two coats of a polish of your choice. I chose white polish as the background color in the manicure pictured above.

2. Using a thin brush or the side tip of your polish brush, apply one vertical line on the left side of the nail bed above the vertical half-way mark. You can mix and match the polishes as I did the manicure shown above.

3. Draw on two more vertical stripes one shorter than the previous one so that it looks like your phone’s reception bars.

4. Apply dots of the opposite polish color using a dotting tool.

5. Let the design completely dry and finish off with a top coat.

Check out this six-second tutorial and find out why mixing techniques creates a great manicure.

Let me know if you try out this design. Good luck!

Standard
DIY, EDM, Nail Art, Nails, Steve Aoki, Vine

Steve Aoki Nail Art

If you follow Steve Aoki on Vine, then on Monday, you too were bombarded with bite-size loops of his single, “Boneless.” The beat is still stuck in my head.

The EDM giant took to the six-second video sharing platform to connect with his fans.

He revined dozens of posts with the hashtag #steveaoki. I decided to try my luck and join in on the fun.

My approach was to get his attention with a Steve Aoki inspired manicure.

The manicure is a sunset gradient with a white accent nail. On the index and ring finger, I painted a palm tree. The idea came from his album cover. I painted the superstar DJ’s signature logo on the accent nail with the white polish.

Here’s hoping the face of Dim Mak sees and maybe even revines my Aokified nail art!

Steve-Aoki-Nails-Aokied-Nail-Art

Hundreds of people on Vine tried to get Steve Aoki’s attention. This was my approach.

Standard
Baseball, DIY, Dodgers, Nail Art, Nail Art Tutorial, Nails, Nails How To, Sports

Dodgers Nails Tutorial

After six years, I found myself back at the Dodgers Stadium in the heart of Los Angeles. Naturally, I sported my love for the team on my nails.

Baseball-Nails-Dodgers-Nails

Be the die hard fan at the next game with an easy-to-do baseball manicure.

As a native Angelina, my first baseball nail manicure had to show off Los Doyers. Here’s how to be the most loyal fan at the next game.

1. Prep the nail with a base coat. Apply two coats of white polish on the ring finger (the baseball nail). Polish two coats of Dodger blue polish on the rest of the nails.

2. Once dry, use a thin brush to apply two red lines in a C shape on the white nail. Add shorter lines on the C-shaped lines to create the stitching on the baseball.

3. Wash and dry the thin brush. Use white polish to apply “LA” on the middle finger. Try to wait until each line is dry to prevent streaking.

4. Let the design completely dry and finish off with a top coat.

Check out this six-second tutorial and find out how easy it is to flaunt your fandom.

Batter up!

Dodger-Nails-Baseball-Nails-Nail-Art

Though I don’t have proof, I do have witnesses to testify these babies made it to the jumbo tron!

Standard