Beauty, DIY, Essie, Nail Art, Nail Art Tutorial, Nail Polish Swatch, Nails, Nails How To, Style

Plunging V Chevron Nail Art Tutorial

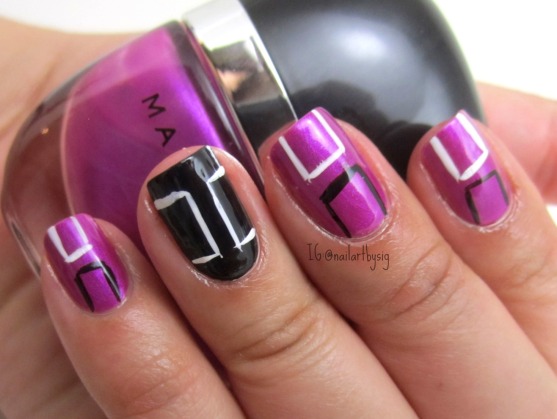
Happy Mani Monday! I’m kicking off the week with a pop of color and a simple design.

If you want to do the same, you’ll need to first pick two awesome nail polishes. I used Essie’s The Girls Are Out ($8.50) and NYC  Nail Polish Skyline Blue ($1). You’ll also need some striping tape, scissors and don’t forget your favorite base and top coat.

Here’s how to create an easy-to-do deep V chevron manicure:

1. Use the scissors to cut out at least 20 small pieces of striping tape.

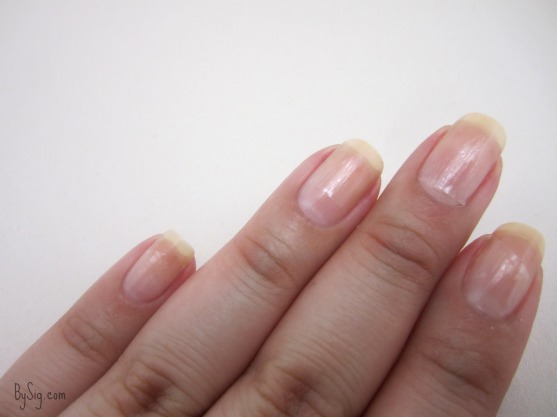
2. Prep your nails with a base coat and let it dry.  Apply two coats of one polish (I used pink) on the accent nail and paint  the rest of the nails another color (I used blue).

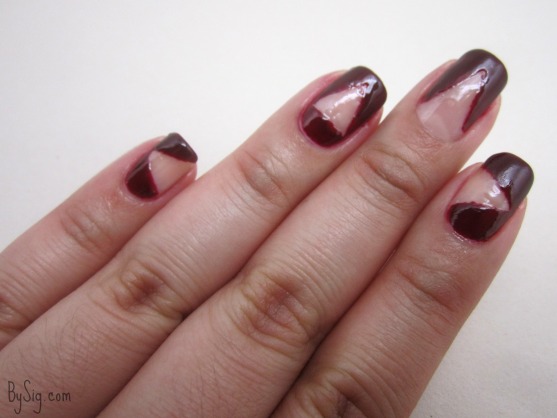
3. Once the base color is completely dried and  hardened, apply two pieces of tape to create an inverted pyramid shape starting from the cuticle.

nail-art-tutorial-chevron-nails

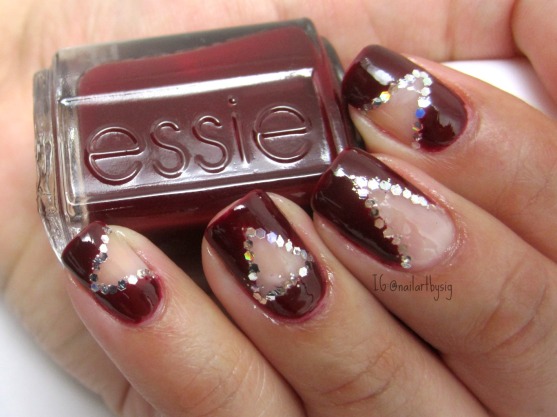
4. Paint inside the triangle using the opposite color of the base polish. Quickly and carefully remove the tape while the polish is still wet. When the design is dry, seal it on with a layer of top coat.

deep-v-chevron-manicure

What do you think of this look? Let me know in the comments below!

Standard
Art Deco, Beauty, China Glaze, DIY, Marc Jacobs, Nail Art, Nail Art Tutorial, Nail Polish Swatch, Nails, Nails How To, Style

Graphic Square Nail Art

Make an already bold nail polish even bolder with a graphic design.

I’m wearing Marc Jacobs 118 Oui! ($18) and China Glaze Liquid Leather ($5.50) on the accent. I painted mirrored square halves on the top and bottom of the nails using black and white striper polishes.

graphic-square-nails

What do you think of this design? Let me know in the comments below!

Standard
Beauty, DIY, Essie, Fashion, Nail Art, Nail Art Tutorial, Nail Polish Swatch, Nails, Nails How To, Negative Space, Style

Negative Space Nail Art Tutorial Using Scotch Tape

If you’re in the mood to unwind with some nail art, I’ve got the mani for you! Read below and find out how you can execute a deep red wine negative space design.

Supplies: Base coat, deep red wine polish, hex glitter polish, top coat, scissors, Scotch tape, dotting pen (or toothpick) and tweezers.

You’re just six steps away from an intoxicating look.

1. Cut out ten small triangles using tape and scissors. The pieces should be small enough to create a negative space around it.

negative-space-tape-mani-1

2. Prep the nail with your favorite base coat. I used Essie’s protein base polish ($8.50). Once the polish is completely dry and hardened, use the tweezers to place the triangles on your nails. Have fun with the placement!

negative-space-tape-mani-2

3. Apply the deep red polish (I used Essie’s Bordeaux, $8.50) around the triangle to fill in the negative space. Quickly peal off the tape and be careful not to smudge the polish.

negative-space-tape-mani-3

4. Place a blot of glitter polish on paper and use the dotting pen to pick up and apply sequins. I used Pure Ice’s Dazzle Me ($9.95).

negative-space-tape-mani-4

5. Place the sequins on the nail to outline the triangle.

negative-space-tape-mani-5

6.Once the entire design is completely dry, finish off with a top coat. I used Ocean Nail Supply’s My Quick Dry Nail Lacquer.

negative-space-tape-mani

What do you think of this design? Let me know in the comments below!

Standard
Beauty, DIY, Fashion, Nail Art, Nail Art Tutorial, Nails, Nails How To, Style

Negative Space Chevron Nails Tutorial

You’re four steps away from showy and posh nail art.

negative-space-nails-tutorial

Instagram, @nailartbysig.

Execute this design in a breeze by mapping out the placement of the striping before application.

negative-space-chevron-how-to

Instagram, @nailartbysig.

What do you think of this look? Let me know in the comments below!

Standard
Beauty, DIY, Nail Art, Nail Art Tutorial, Nails, Nails How To, Uncategorized

NYFW Inspired Manicure Tutorial: Halo Nails

New York Fashion Week was nail art heaven!

From textured nails to sleek designed nail art and the occasional three-dimensional pieces on fingertips, manicures held their own on the runway.

A halo nail design showcased by Ruffian, particularly caught my interest and I recreated it.

Find out how to get the cat walk look.

halo-nails-tutorail

The platinum halo stands out behind a matte finish.

What you will need: Base coat, silver polish, top coat, black polish and matte top coat.

1. Prep the nail with a base coat. Apply two coats of silver polish on all the nails. Once dry, apply top coat.

2. Use black polish to paint an upside down U and fill it in to form the platinum halo on the top. Apply a matte coat on the black polish when it is dry.

Check out this six-second tutorial to see how this fabulous manicure went from runway to everyday.

What do you think of the halo manicure? If you try the design, let me know by tagging me on Instagram @nailartbysig! 

Standard
Baseball, DIY, Dodgers, Nail Art, Nail Art Tutorial, Nails, Nails How To, Sports

Dodgers Nails Tutorial

After six years, I found myself back at the Dodgers Stadium in the heart of Los Angeles. Naturally, I sported my love for the team on my nails.

Baseball-Nails-Dodgers-Nails

Be the die hard fan at the next game with an easy-to-do baseball manicure.

As a native Angelina, my first baseball nail manicure had to show off Los Doyers. Here’s how to be the most loyal fan at the next game.

1. Prep the nail with a base coat. Apply two coats of white polish on the ring finger (the baseball nail). Polish two coats of Dodger blue polish on the rest of the nails.

2. Once dry, use a thin brush to apply two red lines in a C shape on the white nail. Add shorter lines on the C-shaped lines to create the stitching on the baseball.

3. Wash and dry the thin brush. Use white polish to apply “LA” on the middle finger. Try to wait until each line is dry to prevent streaking.

4. Let the design completely dry and finish off with a top coat.

Check out this six-second tutorial and find out how easy it is to flaunt your fandom.

Batter up!

Dodger-Nails-Baseball-Nails-Nail-Art

Though I don’t have proof, I do have witnesses to testify these babies made it to the jumbo tron!

Standard