
This ultra feminine manicure is a swatch of Love Every Minute by Essie. The polish applies a bit streaky, but I reached a desired opacity after three coats. I recommend a good top coat to smooth out the finish. 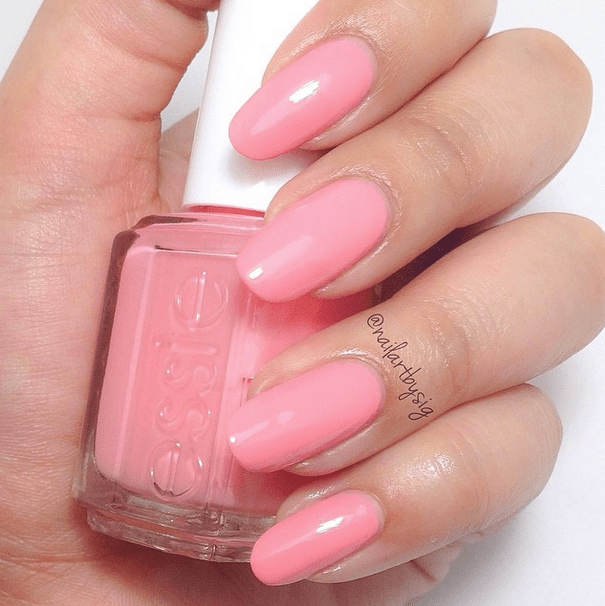 What do you think of this look? Let me know in the comments below.
Category Archives: Essie
Swatch of Essie’s Fashion Playground
Say hello to this plucky pistachio shimmer beauty that is Essie’s Fashion Playground!
To get a desired opacity, I applied three coats. In natural light, this pretty color shines with a subtle glimmer infused in the lacquer.
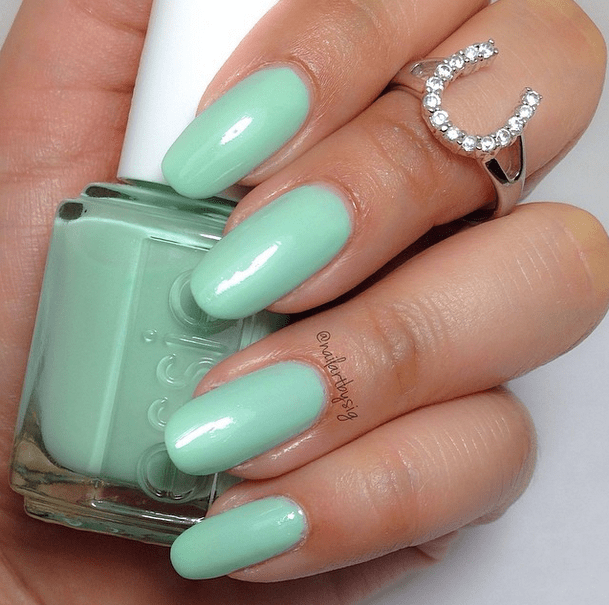
What do you think of this polish? Let me know in the comments below!
Swatch of Above It by Dermelect
Dermelect’s nail polish is infused with peptide which helps strengthen nails. So not only do you get a rich, creamy and gorgeous finish like this, you get nourish nails too. I’m wearing three coats of Above It.

What do you think about this look? Let me know in the comments below!
Candy Button Nail Art
Got a sweet tooth? I executed this candy button nail art look by painting over nail art pearls. I used a hefty amount of top coat to make these babies stick.

What do you think about this design? Let me know in the comments below!
Cesar Chavez Nails
Today is the birthday of late civil rights activist, Cesar Chavez. To commemorate the American farm worker turned labor leader I created this nail art look.
Si Se Puede!

How does Cesar Chavez inspire you? Let me know in the comments below.
Eeveelution Nail Art
The Pokemon fandom continues and this time it’s all about Eevee’s evolutions.
From left to right: Jolteon, Vaporeon, Flareon and Espeon.

Which one is your favorite?
Green Nails for St. Patrick’s Day
Go neon and through some glitter on it to attract the luckiest of leprechauns this St. Patrick’s Day.
I am wearing Essie’s Share Your $$ Maker ($8.50) and paired it with Wonderous Star by OPI ($6.75).

Turns out I got fan in Beauty High! The beauty pub featured these babies and said I made them “Green with envy.”
What do you think of this look? Let me know in the comments below!
Pokemon Nail Art
With the recent release of Pokemon on Netflix, many 90s kids are reliving their childhood as they follow Ash Ketchum on his adventure to be the greatest Pokemon master. I proudly admit I can bust out the entire Pokerap, no problem.
To continue my walk down memory lane, I created two manicures inspired by one of my favorite cartoons.
1. Ash wants to “Catch them all,” but I will stick these cuties. Bonus points to those of you that remembers the Squirtle Squad.

2. Grass, fire, water and electric, the core energy type of Pokemon will forever be the best.

Here’s a Vine video showing a time lapse of the making of the Pokemon energy symbols manicure.
Are you a fan of Pokemon? Share in the comments below!
Nails of the Day: Negative Space Glitter Manicure
Glitter and negative space designs are two of my favorite things. I figured it’s time I combined the two again. Here are today’s nails of the day:

I layered two coats of Essie’s Dive Bar ($8.50) on my nails and used a Q-tip dipped in polish remover to create a negative space line on the mysterious black blue nails. I filled in the negative space with Elf Cosmetics’ Midnight Mystery ($2) and applied three coats of the glitter polish on the accent.
What do you think of this look? Let me know in the comments below!
Plunging V Chevron Nail Art Tutorial
Happy Mani Monday! I’m kicking off the week with a pop of color and a simple design.
If you want to do the same, you’ll need to first pick two awesome nail polishes. I used Essie’s The Girls Are Out ($8.50) and NYC Nail Polish Skyline Blue ($1). You’ll also need some striping tape, scissors and don’t forget your favorite base and top coat.
Here’s how to create an easy-to-do deep V chevron manicure:
1. Use the scissors to cut out at least 20 small pieces of striping tape.
2. Prep your nails with a base coat and let it dry. Apply two coats of one polish (I used pink) on the accent nail and paint the rest of the nails another color (I used blue).
3. Once the base color is completely dried and hardened, apply two pieces of tape to create an inverted pyramid shape starting from the cuticle.
![]()
4. Paint inside the triangle using the opposite color of the base polish. Quickly and carefully remove the tape while the polish is still wet. When the design is dry, seal it on with a layer of top coat.
![]()
What do you think of this look? Let me know in the comments below!
