Beauty, China Glaze, DIY, Marc Jacobs, Nail Art, Nail Art Tutorial, Nail Polish Swatch, Nails, Nails How To, Style

Bob Marley Inspired Nails

Bob Marley is worshipped by millions and after watching the documentary, Marley, I finally understand why. While finding out his story and discovering the beliefs of the Rastafarian movement, it was clear that Marley is a legacy of peace.  In honor of the late reggae singer, I created this manicure to show One Love.

rasta-nails-one-love

What do you think of this look? Let me know in the comments below!

Standard
Beauty, China Glaze, DIY, Marc Jacobs, Nail Art, Nail Art Tutorial, Nail Polish Swatch, Nails, Nails How To, Sally Hansen, Style

Prismatic Nails of the Day

As a huge fan of Katy Perry, I’ve recently obsessed over prisms and prismatic visuals particularly in manicures. So when I got these tiny nail art accessories that reflect amazing color and shine, I was stoked.

prism-plastic-nail-art

I’ve done some research and have been unable to find the exact name of the nail art accessory. From here on out, they will be referred to as prismatic plastic pieces.

Here’s are two prismatic manicures I think Katy Perry would approve:

1. This purple dream machine lets the light in.

I used Marc Jacobs 122 Ultraviolet ($18) a base and created a gradient with Wet ‘n Wild On a Trip ($6), then added pieces of the prismatic plastic over it. On the accent nails I used Prism by China Glaze ($6) as a base and placed dots of Ultraviolet over it using a dotting pen.

ultra-violet-marc-jacobs-prism

2. A bit of mystery and reflection.

I used Essie’s Dive Bar and placed prismatic pieces over it. On the accent nail I used Marc Jacobs Stone Jungle 146 ($18) as a base, applied stripes using a black striper brush and added a thin coat of Sally Hansen’s Mermaid’s Tale ($7).

prismatic-plastic-mani

What do you think of these looks? Let me know in the comments below!

Standard
Beauty, Nail Art, Nail Art Tutorial, Nail Polish Swatch, Nails, Nails How To, Style, Vine

Denver Broncos Nail Art

Happy Super Bowl weekend!  My loyalty this Sunday will be with the Denver Broncos. To get ready for kick off, I executed this fanicure.

Major congrats to five-time NFL MVP award winner, Peyton Manning. To celebrate this achievement I am already nailgating.

denver-broncos-nails

What do you think of this fanicure? Let me know in the comments below!

Standard
Art Deco, Beauty, China Glaze, DIY, Marc Jacobs, Nail Art, Nail Art Tutorial, Nail Polish Swatch, Nails, Nails How To, Style

Graphic Square Nail Art

Make an already bold nail polish even bolder with a graphic design.

I’m wearing Marc Jacobs 118 Oui! ($18) and China Glaze Liquid Leather ($5.50) on the accent. I painted mirrored square halves on the top and bottom of the nails using black and white striper polishes.

graphic-square-nails

What do you think of this design? Let me know in the comments below!

Standard
Art Deco, Beauty, DIY, Essie, Fashion, Marc Jacobs, Nail Art, Nail Art Tutorial, Nail Polish Swatch, Nailed Kit, Nails, Nails How To

Jamberry Nails Review

After recently playing with Nailed Kit’s water slide nail art decals and Essie’s nail appliques, my love for vinyl nail stickers has definitely grown. So when Jill, a Jamberry Nails Independent Consultant, sent me over a sample of their nail wraps I got psyched and they didn’t disappoint.

Initially I was impressed with Jamberry Nails intricate and varied designs. I received six decals and chose to try them on as an accent.

jamberry-nails-decals

The application process called for a unique step after a routine nail cleaning and cuticle push. The nail wrap requires heat to soften the adhesive before you stick it on. I pointed my blow dryer on the wrap and used it on a low heat setting for about 5 seconds. It worked.

how-to-use-jamberry-nails

I placed the wrap on my ring finger while it was still warm. I found it best to make sure the placement fit before pressing on the wrap to seal it on because the glue got pretty sticky. I used a rubber cuticle pusher to flatten out any bubbles that formed.

jamberry-nails-review

I folded the leftover sticker and filed it off in a downward motion to get the right fit. While the included directions do not mention to seal the sticker with a top coat, I recommend applying a layer of it if you intend on wearing the wraps for a few days.

jamberry-nails-review-1This is a sample of Reminisce ($15). I paired it with Marc Jacobs’ 128 Nirvana ($18).

jamberry-floral-nails-marc-jacobs-nail-polish

This is Poised Plaid ($15). I paired it with Essie’s Blanc ($8.50).

jamberry-nails-poised-plaid

This is Wisteria ($15). I paired it with Marc Jacobs’ 122 Ultraviolet ($18).

jamberry-nails-wisteria

What do you think of Jamberry Nails? Let me know in the comments below!

Standard
Beauty, DIY, Fashion, Marc Jacobs, Nail Art, Nail Art Tutorial, Nail Polish Swatch, Nails, Nails How To, Style

Marc Jacobs 114 Snap! Nail Polish Swatch

Marc Jacobs 114 Snap! ($18) is the collection’s mandarin orange.

The beautiful orange hue provided a much needed pop of color during this cold season. While wearing Snap! I noticed my skin glowed! I’m looking forward to sport this polish in the summer.

marc-jacobs-nail-polish-snap-swatc

The creamy formula allowed for easy application with an opaque finish after the initial coat.

marc-jacobs-orange-snap-nail-polish

Snap! has a pretty fast dry time and leaves a high-gloss finish. The orange hue is very easy on the eyes even after a second coat.

snap-marc-jacobs-nail-polish-swatch

I was so impressed by the extra smooth finish I got after two coats, I didn’t even apply a top coat. I mean just look at these bright beauties!

marc-jacobs-snap-nail-polish-swatch

This is the seventh installment of a ten-part series of Marc Jacobs nail lacquer swatches. Keep scrolling down for the rest and stay tuned for more.

What do you think of Snap?Let me know in the comments below!

Standard
Beauty, DIY, Fashion, Marc Jacobs, Nail Art, Nail Art Tutorial, Nail Polish Swatch, Nails, Nails How To

Ultraviolet by Marc Jacobs Nail Polish Swatch

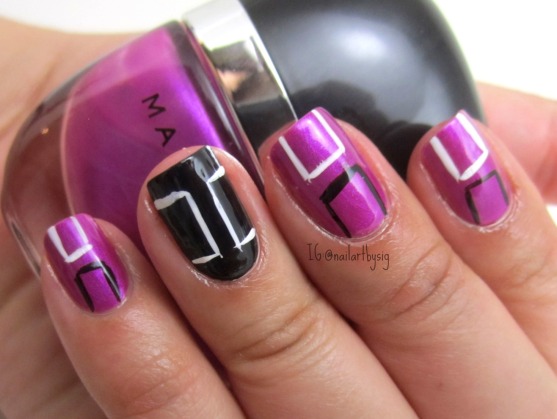
Marc Jacobs 122 Ultraviolet ($18)  nail lacquer is the collection’s violet purple. The color is a super posh purple that is bright when it needs to be and is subtle in indoor lighting.  I truly feel royal in this manicure.

This is the third Marc Jacobs polish I try. After familiarizing myself with the creamy formula, I can’t emphasize enough that steady application, as well as waiting for each coat to completely dry are essential. Especially if you want to get the sleek and high shine finish the bottle promises. The great news is, the polish has a pretty quick dry time.

marc-jacobs-ultraviolet-nail-polish

I applied a very thin layer for the initial coat. At first swipe the polish gives off more of the red undertone and looks like a shade of magenta.

ultraviolet-marc-jacobs-purple

After a second coat, the blue hue is prevalent which reflects the color you see on the bottle.

ultraviolet-marc-jacobs

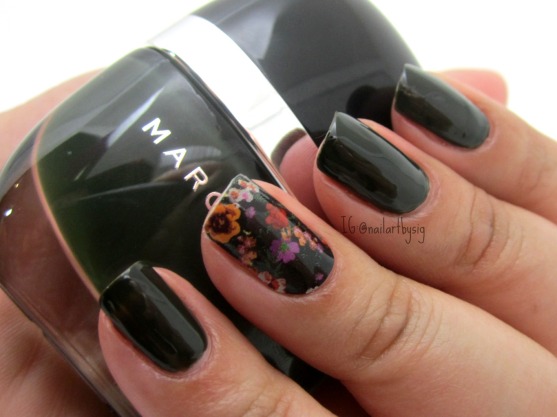
I’ve tried two other Marc Jacobs nail polishes and this was the first color that needed three coats to get the desired opacity. Keep scrolling down to see the other two Marc Jacobs nail polish swatches.

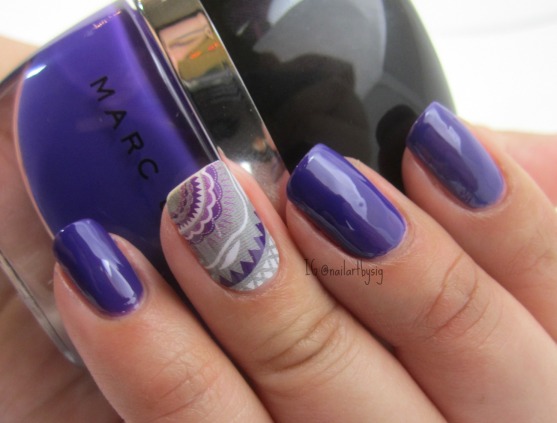
Here is what a third coat of Ultraviolet looks like.

ultraviolet-marc-jacobs

The polish has an ultra shine formula that wouldn’t require a top coat. To smooth off the entire design though, I added a thin layer of it.

marc-jacobs-nail-polish

This is the third installment of a ten-part series of Marc Jacobs nail lacquer swatches. Stay tuned for more.

What do you think of Ultraviolet? Let me know in the comments below!

Standard