Beauty, Butter London, DIY, Essie, Fashion, Nail Art, Nail Art Tutorial, Nail Polish Swatch, Nails, Nails How To, Sally Hansen, Style

NYFW Inspired Nail Art from Prabal Gurung

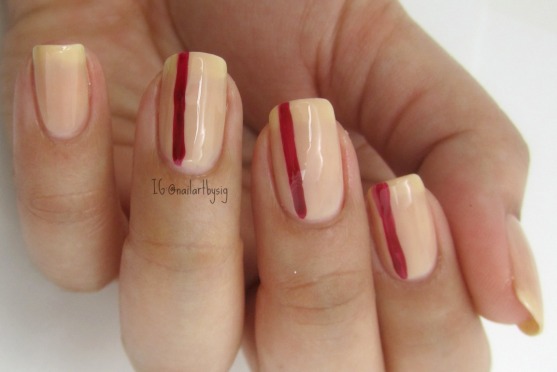
A sleek and minimalist nail art look made a statement at New York Fashion Week. The design originally executed by nail legend, Jin Soon Choi, was created for a collaboration between designer Prabal Gurung and Sally Hansen.

prabal_nails

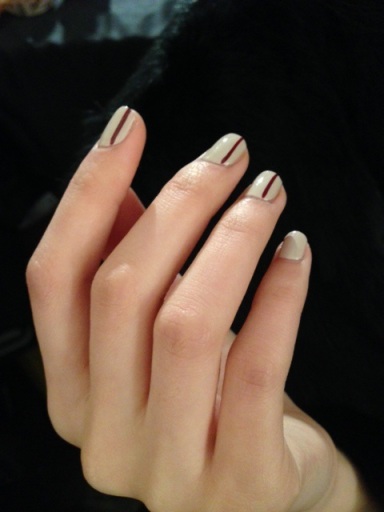
Photo Credit: Rachel Adler, Beauty High

Much of Gurung’s Fall 2014 designs were inspired by the beauty of Nepal. The country’s rich color palette resonated in Sally Hansen’s newest limited edition polishes that were used to make the look. The collection will launch in September.

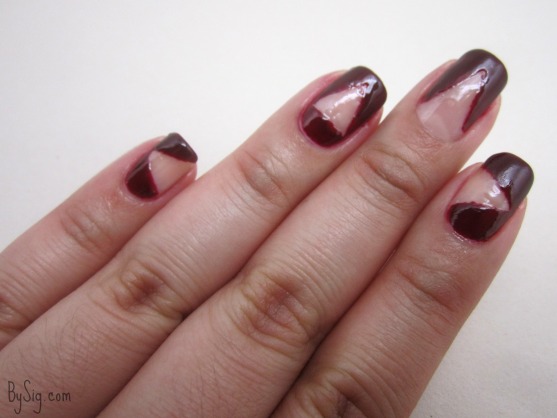
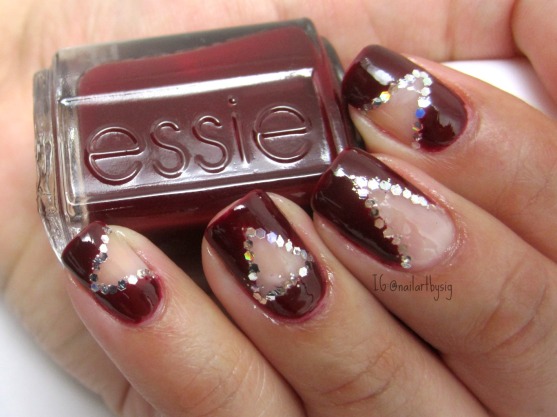
To recreate the chic look of a nude base and a thin burgundy striped I used Butter London’s Flawless Base Coat ($19) and Essie’s Bordeaux ($8.50).

prabal-gurung-nails

What do you think of this look? Let me know in the comments below. 

Standard
Art Deco, Butter London, DIY, Essie, Marc Jacobs, Nail Art, Nail Art Tutorial, Nail Polish Swatch, Nails, Nails How To, Negative Space, Orly, Style

5 Valentine’s Day Nail Art Ideas

While Valentine’s Day is meant to appreciate and acknowledge loved ones, the holiday is also an opportunity to love yourself a little bit more.

Here are five manicure ideas that will show off your inner confidence and big heart:

1. Perfectly pink digits with a negative space design that says you’re ready to try something new.

valentines-day-nails-negative-space-butter-london

2. Two hearts paired with metallic polish for the hopeless romantic with an edge.

valentines-day-nails-hearts

3. Plain white nails to embrace a blank slate filled with possibilities of love.

essie-blanc-valentines-day-nails

4. A classic crimson base manicure with a plaid design for the bold lover.

valentines-day-nails-plaid-nails

5. Glitzy nails for the Valentine that wants to show off her sweet side.

valentines-day-nail-art

What do you think of these Valentine’s Day designs? Let me know in the comments below!

Standard
DIY, Fashion, Nail Art, Nail Art Tutorial, Nail Polish Swatch, Nails, Nails How To, Style, Uncategorized

Girly Super Bowl Sunday Nails

Looking to keep the nail art neutral this Super Bowl Sunday? I’ve got the look for you!

Up the ante with glitter and make a statement with a bit of design to show your support for the die hard football fans.

Here’s a girly football manicure you can sport at kick off:

girly-football-nails

What do you this of this look? Let me know in the comments below!

Standard
Beauty, DIY, Fashion, Nail Art, Nail Art Tutorial, Nail Polish Swatch, Nails, Nails How To, Vine

Seattle Seahawks Nail Art

The Super Bowl kick off is happening on Sunday, are you ready to get your nailgating on?

If you’re rooting for the Seattle Seahawks, then this manicure is surely to score big with the fans.

seattle-seahawks-nail-art

What do you think of this fanicure? Let me know in the comments below!

Standard
Beauty, Nail Art, Nail Art Tutorial, Nail Polish Swatch, Nails, Nails How To, Style, Vine

Denver Broncos Nail Art

Happy Super Bowl weekend!  My loyalty this Sunday will be with the Denver Broncos. To get ready for kick off, I executed this fanicure.

Major congrats to five-time NFL MVP award winner, Peyton Manning. To celebrate this achievement I am already nailgating.

denver-broncos-nails

What do you think of this fanicure? Let me know in the comments below!

Standard
Art Deco, Beauty, China Glaze, DIY, Marc Jacobs, Nail Art, Nail Art Tutorial, Nail Polish Swatch, Nails, Nails How To, Style

Graphic Square Nail Art

Make an already bold nail polish even bolder with a graphic design.

I’m wearing Marc Jacobs 118 Oui! ($18) and China Glaze Liquid Leather ($5.50) on the accent. I painted mirrored square halves on the top and bottom of the nails using black and white striper polishes.

graphic-square-nails

What do you think of this design? Let me know in the comments below!

Standard
Beauty, China Glaze, DIY, Essie, Fashion, Nail Art, Nail Art Tutorial, Nail Polish Swatch, Nails, Nails How To, Style, Vine

Nails of the Day: Glitzy Pastel Striped Nail Art

I recently added Essie’s Full Steam Ahead ($8.50) to my nail polish collection.

essie-full-steam-ahead

The medium toned lilac bottled beauty inspired me to create a glitzy pastel striped nail art design.

glitzy-striped-nails

This is a little close-up of the rhinestone action happening on the glitter accent nail. I used Prism by China Glaze ($6) to compliment the sheer shimmer of Essie’s East Hampton Cottage ($8.50) base color.

glitzy-striped-nail-art

Here’s a Vine time lapse video of how the manicure was executed.

What do you think of this look? Let me know in the comments below!

Standard
Art Deco, Beauty, DIY, Essie, Fashion, Marc Jacobs, Nail Art, Nail Art Tutorial, Nail Polish Swatch, Nails, Nails How To, Negative Space, Vine

Nails of the Day: Gradient Negative Space Nail Art

Happy Grammy’s day! Contemporary chic meets absolute cuteness in today’s featured nail art.

I used Sugar Coat by Wet n Wild ($1.49) as a base color, added Oui! by Marc Jacobs ($18) as a gradient and layered a coat of Sparked by Wet n Wild ($4.70). To outline the accent nail I used Blanc by Essie ($8.50). I applied a nail accessory from Ocean Nails Supply in the center negative space and placed sequins from Jewelry Heist by Spoiled ($1.99) around the nail art ring.

gradient-negative-space-nail-art

Here’s a time lapse video of the making of this manicure.

What do you think of this look? Let me know in the comment below!

Standard
Art Deco, Beauty, DIY, Essie, Fashion, Marc Jacobs, Nail Art, Nail Art Tutorial, Nail Polish Swatch, Nailed Kit, Nails, Nails How To

Jamberry Nails Review

After recently playing with Nailed Kit’s water slide nail art decals and Essie’s nail appliques, my love for vinyl nail stickers has definitely grown. So when Jill, a Jamberry Nails Independent Consultant, sent me over a sample of their nail wraps I got psyched and they didn’t disappoint.

Initially I was impressed with Jamberry Nails intricate and varied designs. I received six decals and chose to try them on as an accent.

jamberry-nails-decals

The application process called for a unique step after a routine nail cleaning and cuticle push. The nail wrap requires heat to soften the adhesive before you stick it on. I pointed my blow dryer on the wrap and used it on a low heat setting for about 5 seconds. It worked.

how-to-use-jamberry-nails

I placed the wrap on my ring finger while it was still warm. I found it best to make sure the placement fit before pressing on the wrap to seal it on because the glue got pretty sticky. I used a rubber cuticle pusher to flatten out any bubbles that formed.

jamberry-nails-review

I folded the leftover sticker and filed it off in a downward motion to get the right fit. While the included directions do not mention to seal the sticker with a top coat, I recommend applying a layer of it if you intend on wearing the wraps for a few days.

jamberry-nails-review-1This is a sample of Reminisce ($15). I paired it with Marc Jacobs’ 128 Nirvana ($18).

jamberry-floral-nails-marc-jacobs-nail-polish

This is Poised Plaid ($15). I paired it with Essie’s Blanc ($8.50).

jamberry-nails-poised-plaid

This is Wisteria ($15). I paired it with Marc Jacobs’ 122 Ultraviolet ($18).

jamberry-nails-wisteria

What do you think of Jamberry Nails? Let me know in the comments below!

Standard
Beauty, DIY, Essie, Fashion, Nail Art, Nail Art Tutorial, Nail Polish Swatch, Nails, Nails How To, Negative Space, Style

Negative Space Nail Art Tutorial Using Scotch Tape

If you’re in the mood to unwind with some nail art, I’ve got the mani for you! Read below and find out how you can execute a deep red wine negative space design.

Supplies: Base coat, deep red wine polish, hex glitter polish, top coat, scissors, Scotch tape, dotting pen (or toothpick) and tweezers.

You’re just six steps away from an intoxicating look.

1. Cut out ten small triangles using tape and scissors. The pieces should be small enough to create a negative space around it.

negative-space-tape-mani-1

2. Prep the nail with your favorite base coat. I used Essie’s protein base polish ($8.50). Once the polish is completely dry and hardened, use the tweezers to place the triangles on your nails. Have fun with the placement!

negative-space-tape-mani-2

3. Apply the deep red polish (I used Essie’s Bordeaux, $8.50) around the triangle to fill in the negative space. Quickly peal off the tape and be careful not to smudge the polish.

negative-space-tape-mani-3

4. Place a blot of glitter polish on paper and use the dotting pen to pick up and apply sequins. I used Pure Ice’s Dazzle Me ($9.95).

negative-space-tape-mani-4

5. Place the sequins on the nail to outline the triangle.

negative-space-tape-mani-5

6.Once the entire design is completely dry, finish off with a top coat. I used Ocean Nail Supply’s My Quick Dry Nail Lacquer.

negative-space-tape-mani

What do you think of this design? Let me know in the comments below!

Standard